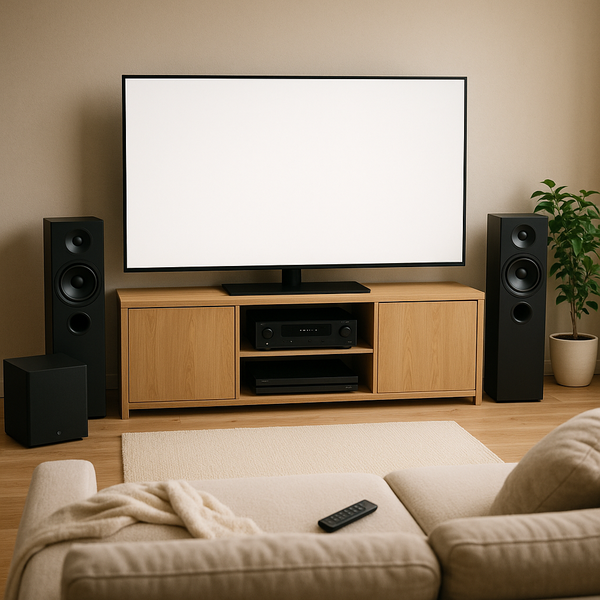
Ready to transform your living room into a cinematic oasis? Setting up a home theater can seem daunting, but with the right guidance, you can achieve an immersive audio-visual experience. This guide will walk you through the essential steps, from choosing the right components to optimizing your sound and picture for ultimate enjoyment. Get ready to elevate your entertainment!
Choosing Your Display: Size, Resolution, and Technology
The centerpiece of any home theater is the display. When selecting a TV or projector, consider the size of your room and your viewing distance. For larger rooms, a big screen TV or a projector with a sizable projection screen is ideal. Resolution is paramount for clarity; 4K Ultra HD offers four times the pixels of Full HD, providing a sharper, more detailed image. When it comes to technology, OLED displays excel in contrast and black levels, perfect for dark room viewing, while QLED TVs offer excellent brightness and color volume, suitable for well-lit environments. Projectors, on the other hand, can offer a truly cinematic experience with screen sizes that surpass even the largest TVs, but they require a dedicated space and a good projection screen for optimal performance. Think about ambient light in your room, as this will influence whether a TV or projector is the better choice, and whether you need a high-brightness model or one that thrives in darkness. Ultimately, the best display for you will balance size, resolution, technology, and your specific viewing environment.
Sound Systems: Achieving Immersive Audio
Audio is as crucial as video for a captivating home theater experience. You have several options, from soundbars to full surround sound systems. A soundbar is a convenient, all-in-one solution that can significantly improve your TV’s audio, often featuring virtual surround sound. For a more enveloping experience, consider a home theater in a box (HTiB) system, which includes a receiver and multiple speakers. The pinnacle of home theater audio is a component system, allowing you to choose individual speakers (fronts, center, surrounds, and subwoofers) and an AV receiver. A 5.1 system is standard, with three front speakers, two surround speakers, and a subwoofer. For even more immersive sound, consider Dolby Atmos or DTS:X, which add height channels to create a three-dimensional soundscape. Proper speaker placement is key; the center channel should be positioned directly below or above the TV for dialogue clarity, front speakers should be equidistant from the TV and your main viewing position, and surround speakers should be placed to the sides and slightly behind you. Experiment with subwoofer placement to find the spot with the smoothest bass response.
Connectivity and Cabling: The Backbone of Your Setup
Connecting all your devices seamlessly is vital. High-definition multimedia interface (HDMI) cables are the standard for transmitting both audio and video signals. Ensure you're using certified High-Speed HDMI cables, especially for 4K content, to support the necessary bandwidth. For older devices or specific audio setups, you might encounter other connections like optical audio (Toslink) or coaxial digital audio. When connecting your Blu-ray player, game console, streaming device, and other sources to your AV receiver or TV, HDMI is the preferred choice. Pay attention to HDMI ARC (Audio Return Channel) and eARC (Enhanced Audio Return Channel) if your setup supports it; these allow audio to travel back from the TV to the receiver/soundbar using a single HDMI cable, simplifying your wiring. Organizing your cables with zip ties or cable sleeves will not only make your setup look cleaner but also prevent them from getting tangled and damaged. Consider a universal remote control to manage all your devices with ease, reducing the clutter of multiple remotes.
Calibration and Optimization: Fine-Tuning for Perfection
Once everything is connected, it’s time for calibration. This process fine-tunes your display and audio settings to ensure you’re getting the best possible picture and sound quality. For your TV, adjust brightness, contrast, color, and sharpness based on your room's lighting conditions. Many TVs have picture modes like 'Cinema' or 'Movie' that offer more accurate color reproduction out of the box. You can also use calibration discs or online tools to fine-tune specific settings. For audio, use your AV receiver's automatic setup feature (like Audyssey, YPAO, or Dirac Live) with a calibration microphone. These systems measure the acoustics of your room and adjust speaker levels, distances, and equalization to optimize the sound. If you're not using an automated system, manually set speaker levels and distances for each speaker to ensure a balanced soundstage. Experiment with different audio processing modes on your receiver to find what sounds best for various content types, from movies to music.
Room Acoustics and Seating: The Finishing Touches
The acoustics of your room play a significant role in the overall sound quality of your home theater. Hard, reflective surfaces like bare walls and large windows can cause echo and distortion. To improve acoustics, consider adding soft furnishings such as thick curtains, carpets, and upholstered furniture, which absorb sound. Acoustic panels can also be strategically placed on walls to manage reflections. Seating placement is equally important. Position your main viewing seats equidistant from the side walls and at the correct viewing distance for your display. Avoid placing speakers too close to walls or corners, as this can lead to muddy bass. Ensure that your seating allows for an unobstructed view of the screen and that the primary speakers are positioned at ear level when seated. Creating a dedicated space, even if it's just a section of a larger room, helps to focus the experience and minimize external distractions. By paying attention to these final details, you can elevate your home theater from good to truly exceptional.

